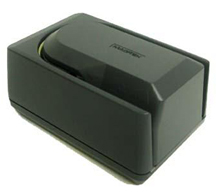
Verifone CR600 & MagTek MiniMICR

- Baud Rate: 4800-19200 (Should be configured for 19200)
- USB: Must use Prolific USB-to-Serial Converter.
NOTE: The adapter only emulates a serial port. It does not make it a "USB enabled" device.
- MagTek MiniMICR Serial: Must use proprietary cable Part#: 22517579
- Verifone CR600 Serial: Must use proprietary cable Part#: 05465-00
Setup Process for serial cable:
- Plug the serial cable into the device and the COM port on the back of the PC, or the USB-to-Serial converter. Plug in the power supply which plugs into the device.
- Log on www.cross-check.com/logon
- Click on either Approve a Check, then MICR Scan Single Check.
- License agreement page will show ¹ and a pop-up window needs to happen. The browser must allow pop-ups for the "print receipt". If a pop-up is blocked, a pop-up blocker detector should detect this and give a warning. Refresh the page to make the pop-up window appear again. The pop-up window must be open for at least 1-2 seconds before closing it.
- If using the Prolific USB-to-Serial Converter we provide, the driver needs to be downloaded and installed from this popup window first before closing the window. SEE USB-TO-SERIAL SETUP INSTRUCTIONS
- Close the popup window.
- Click I Accept
- Install the MagTek MICRImage plug-in (created by MagTek), which allows a web page to communicate with the device . Both the Verifone CR600 and the MagTek MiniMICR use this.
- *** SCAN CHECK THROUGH MICR READER NOW *** should show and the device should be ready for scanning if the correct config settings are set.
- Scan a test check through.²
Trouble Shooting:
- If receiving an error message communicating with the device, verify the PC meets all system requirements (internet browser, hard drive space, operating system, etc.)
- Verify the user has administrative privileges on their PC as this is required. Script errors being reported by the browser usually means they don’t have adequate privileges.
- Verify COM ports in the device manager of the merchant’s PC and that they have it plugged into appropriate COM port. This can be accessed on XP by right clicking on my computer in Explore, choosing properties, choosing Hardware tab, then Device Manager.
- On the Error page click “Manual Configure” and try other baud ratings. Click “Save Settings” after setting COM port and baud rate each time. Click “Back to Scan Check” to test each setting. If error still appears, try using “Activate AutoDetect” – this can take several minutes.
¹ If a device is already configured, the license agreement page will not display. Use the Reconfigure Device link at bottom, then click the Change Device button to go back to the license agreement page.
² Business Office Conversion Plus requires the Bank Route # on the check to be “123456780” in order to issue a test approval. MICR Scan Conversion Plus requires ID State “ZZ” and ID Number of “12345” to issue a test approval.